Doteasy Free Guestbook Web Tool

The Doteasy Web Tools are a suite of handy plug-in tools provided to Doteasy customers that allows the addition of dynamic database-driven website functionality without needing to have account scripting capability. These tools can be used by anyone with a Doteasy account.
The Guestbook is the perfect way to let your visitors leave a public message for all to see. It’s very simple to use!
*This tool is supported by all Doteasy.com hosting packages.

Doteasy Free Guestbook Web Tool Setup Tutorial:
- Login to Doteasy Member Zone. Doteasy Member Zone is located athttps://member.doteasy.com/
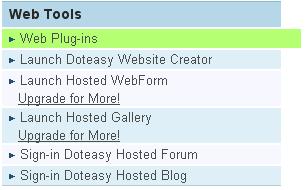
- Click on “Web Plug-ins” under “Web Tools” to proceed.
- Click on the Guestbook link to proceed.

- Click on the “Create Guestbook” link.

- Follow all of the on-screen instructions and enter required information. Once you have configured your Web Tool, you will need to publish it by inserting the Web Tool HTML code into your web page HTML. To do this, first click on the “Publish Guestbook (Get HTML Code)” link. This will link to the Plug-in Code Window.

- Then you need to copy the entire lines of HTML code for pasting into you HTML page. Select the entire block of code and press CTRL-C to copy. The Web Tool can only be installed at the URL listed on the page. Click “Finish” to close the dialog box.
Tip: You can insert your mouse cursor in the text box and press CTRL-A to select all, and CTRL-C to copy.

- Open the HTML page to which you would like to add the Web Tool in a text editor such as Notepad or Macpad. Place the cursor in between the and tags of the HTML code.
Line breaks or word-wrapping cannot be introduced into the Web Tools plug-in code which is why it’s important to use a text editor to paste the plug-in code and not a word processor.
Tip: The position within the and tags of the HTML code that you paste the Web Tools HTML code to, determines where it will appear on the page. If you want the Web Tool to appear at a lower position on the page, paste it closer to the tag.
- After you have successfully pasted the HTML code into your web page, save the changes and close your text editor software.
Start your FTP software to upload your updated page to your server. If your FTP software asks you if you would like to overwrite the existing version of the page, you may reply us. Remember to refresh your web browser to properly display the changes.
Please be advised that Web Tools will not display until they are PUBLISHED to your server. Therefore it is impossible to preview how the Web Tool will look on your.

Comments are closed.